First cut around 60 4" x 4" squares from your material. Note: This scarf is RIDICULOUSLY long (I'm talking about 6 metres) but I think it is necessary so that it sits nice when finished. Once you have the squares, pin them together by placing the top point of one square in the middle of the preceding square, like this:
 Next, run a wide zig-zag stitch down the middle:
 Before you know it you're done:
 Now, I would have taken a picture of me wearing it had I remembered too, but I didn't... and it no longer looks like it does in the picture above. The reason for this, is that I decided it was a tad too boring (like pretty much every other piece of clothing I own), so I challenged myself to brighten it up a bit.
So, in my usual fashion, I did a bit of research on ways to add a bit of 'pizazz' to this thing. I spoke to numerous people and looked at many websites and everything pointed to the use of buttons as a way to add some life to it. But THEN I saw this tutorial on Alisa Burke's blog. When I saw that Cheri over at I am Momma hear me roar had a crack at it too, I figured I might as well apply the same principles they did on the shoes, to my scarf.
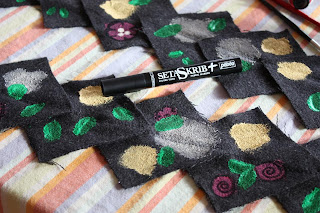
So, first I used a mixture of fabric fixative and acrylic paints to create my 'splotches' and then I used a black fabric paint pen to fill in the lines:
 I am still putting all the lines on (6 metres of scarf remember people!) but here is a sneak peak of how it's looking so far:
 The question now is "Am I going to have the guts to wear it out??" lol


No comments:
Post a Comment
Note: Only a member of this blog may post a comment.