If you aren't familiar with the Ucreate blog, I suggest you pop on over and take a look.
This morning Kari has announced that she has created a commitment-free Online Craft Group, which will see people from all around the globe create the same craft using the same tutorial. Better yet, WE as her faithful blog readers, get to help her to choose which tutorial we would like to do each month.
Now I can't guarantee that I am going to participate each month, as I don't really want to be making things that I simply don't like (although I find it hard to believe that would be the case as practically everything she has on her site is awesome), but I thought it might be a good opportunity for me to stretch myself a bit and learn some new skills and techniques.
Think this is something that you might be interested in? Head on over and let Kari know what you think the first tutorial should be.
Monday, May 17, 2010


Friday, May 14, 2010
My Craft Space Revamp : Storage from Recycled Containers
Using cloth nappies with Little Snicker means I have an abundance of empty nappy soaker containers:

I had been thinking about using them for storage on the craft table for quite some time, but was undecided how to label the lids.
While doing my daily 'blog read', I stumbled across this tutorial over at I am Momma Hear me Roar and thought that while the technique was simple, it would certainly suit my needs.
The process of making the containers into storage was so simple I decided to show you how to make your own:
You will Need:
Empty Containers
Scrapbooking Paper
Mod Podge
Paintbrush
Newspaper
Printer
Instructions:
First, take off the label on the container and cut a piece of decorative paper the same size as your label:
 Spread the back of your paper with Mod Podge:
 Roll the paper onto the container:

Paint a thin layer of Mod Podge over the outside of your paper to help protect it:
 While waiting for the Mod Podge to dry, print the labels for your lids. I used MS Word to type up my labels in a 26pt font called "Snap ITC" (and yes, I do know I have two 'cotton' labels. That's because I have too much cotton for one container!):

Next, find a circle slightly smaller than the inner circle on your lid:
 Use that circle to trace a circle around your labels, making sure the word for your label is in the centre:

Cut around each of the circles, spread Mod Podge on the back and adhere the circle to the lid. Allow to dry before painting a thin coat of Mod Podge over the top to seal:

Once dry, you can store all of your supplies!


I had been thinking about using them for storage on the craft table for quite some time, but was undecided how to label the lids.
While doing my daily 'blog read', I stumbled across this tutorial over at I am Momma Hear me Roar and thought that while the technique was simple, it would certainly suit my needs.
The process of making the containers into storage was so simple I decided to show you how to make your own:
You will Need:
Empty Containers
Scrapbooking Paper
Mod Podge
Paintbrush
Newspaper
Printer
Instructions:
First, take off the label on the container and cut a piece of decorative paper the same size as your label:
 Spread the back of your paper with Mod Podge:
 Roll the paper onto the container:
Paint a thin layer of Mod Podge over the outside of your paper to help protect it:
 While waiting for the Mod Podge to dry, print the labels for your lids. I used MS Word to type up my labels in a 26pt font called "Snap ITC" (and yes, I do know I have two 'cotton' labels. That's because I have too much cotton for one container!):
Next, find a circle slightly smaller than the inner circle on your lid:
 Use that circle to trace a circle around your labels, making sure the word for your label is in the centre:
Cut around each of the circles, spread Mod Podge on the back and adhere the circle to the lid. Allow to dry before painting a thin coat of Mod Podge over the top to seal:

Once dry, you can store all of your supplies!

Thursday, May 13, 2010
Tutorial : Desktop Organiser from an Egg Carton
So today I am FINALLY getting around to writing up the tutorial on how to make an egg carton into a desktop organiser.
But before we launch into that, I just wanted to remind you all that we will be having a GIVEAWAY once we reach 50 followers! We are half way there, so remember to become a follower if you like what you see on my blog.
Ok, onto the tutorial...
You Will Need:
An egg carton
Acrylic Paint
A paint brush
Mod Podge
Two pieces of fabric: 1 piece measuring 70cms x 14cms and another measuring 70cms x 6cms
A piece of ribbon measuring 78cms long
A hot glue gun
A sewing machine
Buttons
A printer
A piece of cardstock
An Iron
A marker
Instructions:
Take your egg carton and give the inside and outside a good coat of your acrylic paint. Make sure that you have plenty of the colour you want to paint it, as you will need a fair bit to cover all sides. Depending on the colour you choose to paint your egg carton, you may need to do a second coat so that you cannot see any of the egg carton through the paint (the writing on the top of the carton will most likely still show through after one coat):

While you are waiting for the paint to dry, take your two pieces of fabric, the ribbon and your button (or buttons). Fold the larger piece of material in half (right sides together) and press:
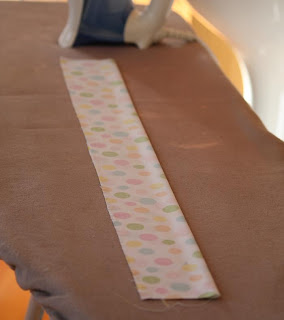 Sew around three edges before turning in the right way and pressing. Fold the open edge in roughly 5mm and press:
 Top stitch around all four edges:
 Next, take your smaller piece of fabric and press each edge under by about 5mm:
 Top stitch around all four edges:
 Place the smaller piece of fabric on top of your large piece of fabric and sew down the middle with a straight stitch to secure the two pieces together:
 Next, make the ruffle by folding the material at random intervals and pinning. Here is an example of how I made mine:
 Sew a line down the middle (as close to the other line you sewed as possible), to secure the ruffles:
 Next, take your ribbon and place it over the line you just sewed. Using a wide zig zag stitch, sew the ribbon to the material, making sure that you have even overhang of ribbon on each end:
 Next, label each of the 'holes' in your egg carton with the numbers 1 through 12. Brush the inside and outside of the egg carton with a thin layer of Mod Podge:

While you are waiting for that to dry, make a template for your inventory listing, similar to the one below. You can print this one, but it does come out slightly blurry:
 Trim the inventory listing so that it will fit inside the lid of your egg carton easily. Once happy, cut your cardstock so that it is a little bigger than this piece of paper (the cardstock acts as a border around your inventory listing card) and adhere the two pieces together. Next, write the items you plan on storing in your organiser onto the inventory listing card and adhere the list to the inside of your egg carton lid ( I haven't actually decided what I'm going to store in this one, so I haven't written on my inventory listing card yet.):

Once done, hot glue gun the ruffle to the top of your egg carton and then trim off the excess ribbon. Glue your button (or buttons) to the ribbon for decoration:

Once you've done all that you're finished:

And here is the inside...all stocked and ready to go:

As always, if you have any questions regarding this tutorial please let me know.
But before we launch into that, I just wanted to remind you all that we will be having a GIVEAWAY once we reach 50 followers! We are half way there, so remember to become a follower if you like what you see on my blog.
Ok, onto the tutorial...
You Will Need:
An egg carton
Acrylic Paint
A paint brush
Mod Podge
Two pieces of fabric: 1 piece measuring 70cms x 14cms and another measuring 70cms x 6cms
A piece of ribbon measuring 78cms long
A hot glue gun
A sewing machine
Buttons
A printer
A piece of cardstock
An Iron
A marker
Instructions:
Take your egg carton and give the inside and outside a good coat of your acrylic paint. Make sure that you have plenty of the colour you want to paint it, as you will need a fair bit to cover all sides. Depending on the colour you choose to paint your egg carton, you may need to do a second coat so that you cannot see any of the egg carton through the paint (the writing on the top of the carton will most likely still show through after one coat):

While you are waiting for the paint to dry, take your two pieces of fabric, the ribbon and your button (or buttons). Fold the larger piece of material in half (right sides together) and press:
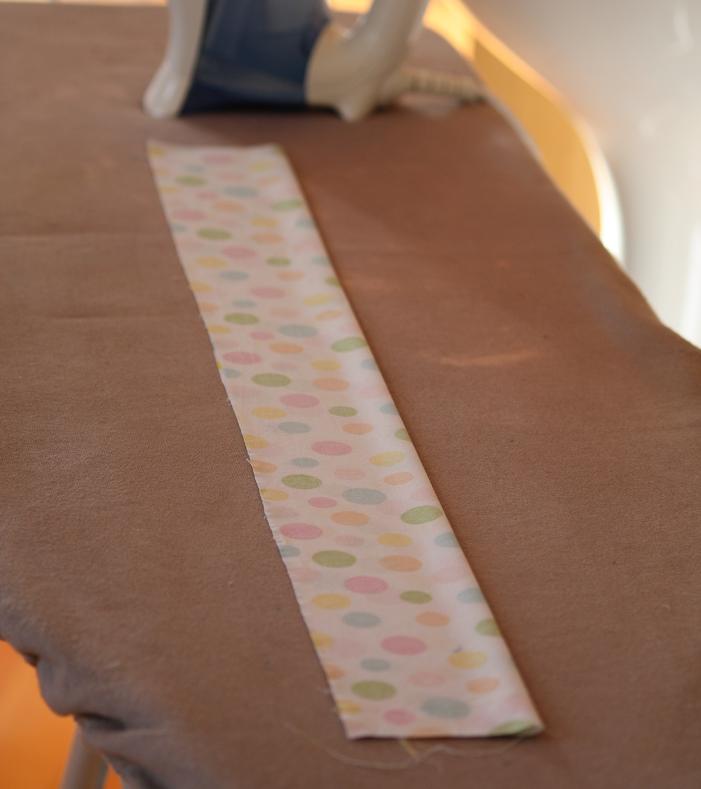 Sew around three edges before turning in the right way and pressing. Fold the open edge in roughly 5mm and press:
 Top stitch around all four edges:
 Next, take your smaller piece of fabric and press each edge under by about 5mm:
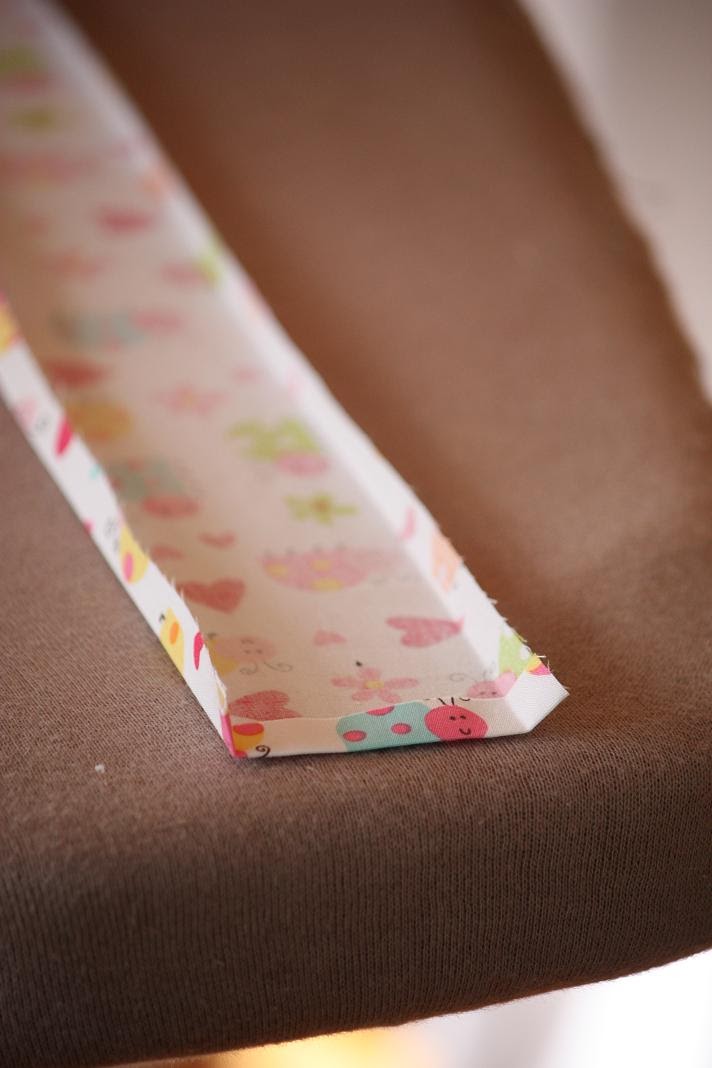 Top stitch around all four edges:
 Place the smaller piece of fabric on top of your large piece of fabric and sew down the middle with a straight stitch to secure the two pieces together:
 Next, make the ruffle by folding the material at random intervals and pinning. Here is an example of how I made mine:
 Sew a line down the middle (as close to the other line you sewed as possible), to secure the ruffles:
 Next, take your ribbon and place it over the line you just sewed. Using a wide zig zag stitch, sew the ribbon to the material, making sure that you have even overhang of ribbon on each end:
 Next, label each of the 'holes' in your egg carton with the numbers 1 through 12. Brush the inside and outside of the egg carton with a thin layer of Mod Podge:
While you are waiting for that to dry, make a template for your inventory listing, similar to the one below. You can print this one, but it does come out slightly blurry:
 Trim the inventory listing so that it will fit inside the lid of your egg carton easily. Once happy, cut your cardstock so that it is a little bigger than this piece of paper (the cardstock acts as a border around your inventory listing card) and adhere the two pieces together. Next, write the items you plan on storing in your organiser onto the inventory listing card and adhere the list to the inside of your egg carton lid ( I haven't actually decided what I'm going to store in this one, so I haven't written on my inventory listing card yet.):
Once done, hot glue gun the ruffle to the top of your egg carton and then trim off the excess ribbon. Glue your button (or buttons) to the ribbon for decoration:

Once you've done all that you're finished:

And here is the inside...all stocked and ready to go:

As always, if you have any questions regarding this tutorial please let me know.
Wednesday, May 12, 2010
How NOT to make a cake
So yesterday it was Matty's birthday and my mum and brother decided to 'make' him a cake. I use the term 'make' loosely as there was certainly no baking involved... well not by them anyway.
It apparently started off as a simple endeavour. The aim was to get him a mud cake from the supermarket. When they got there though, they couldn't decide between the chocolate, caramel or white chocolate mud cakes...so they got all three.
As if it isn't bad enough, buying one person three birthday cakes, they then decided that they should 'build' the mud cakes into some form of tower.... and this is how it arrived at our house:

Apparently it looked awesome when they first constructed it, but they soon found out that marshmallows weren't a suitable substance to build the supporting beams out of (well, it wouldn't take a rocket scientist to work that one out!), so they put in some skewers to hold it in place and topped them with marshmallows too.
Unfortunately the sheer weight of the mud cakes resulted in it having a slight lean by the time it arrived at our house. The sea of whipped cream around the bottom of the cake (which had kit-kat floating in it) was more like a sea of horridly melted cream, but it still tasted good.
There were chocolate skewers sticking out of the side too... oh, and a flake or two on the top. Simply looking at it was enough to give you a heart attack lol!
While I would only give my mum and my brother a 4 out of 10 for the appearance of their cake, they definitely get a 10 out of 10 for enthusiasm and effort!
It apparently started off as a simple endeavour. The aim was to get him a mud cake from the supermarket. When they got there though, they couldn't decide between the chocolate, caramel or white chocolate mud cakes...so they got all three.
As if it isn't bad enough, buying one person three birthday cakes, they then decided that they should 'build' the mud cakes into some form of tower.... and this is how it arrived at our house:

Apparently it looked awesome when they first constructed it, but they soon found out that marshmallows weren't a suitable substance to build the supporting beams out of (well, it wouldn't take a rocket scientist to work that one out!), so they put in some skewers to hold it in place and topped them with marshmallows too.
Unfortunately the sheer weight of the mud cakes resulted in it having a slight lean by the time it arrived at our house. The sea of whipped cream around the bottom of the cake (which had kit-kat floating in it) was more like a sea of horridly melted cream, but it still tasted good.
There were chocolate skewers sticking out of the side too... oh, and a flake or two on the top. Simply looking at it was enough to give you a heart attack lol!
While I would only give my mum and my brother a 4 out of 10 for the appearance of their cake, they definitely get a 10 out of 10 for enthusiasm and effort!
Tuesday, May 11, 2010
Featured on One Pretty Thing
Some of you may have missed it, but last week I was featured twice on One Pretty Thing. Once for my photography light box tutorial and the second time for my fridge magnets.
If you are unfamiliar with oneprettything.com, I suggest you head on over as they have some pretty cool stuff from a wide range of very talented people.
I am hoping to be able to feature again this week (if I can get my act together and finish off the egg carton organiser tutorial), so keep an eye out for that.
If you are unfamiliar with oneprettything.com, I suggest you head on over as they have some pretty cool stuff from a wide range of very talented people.
I am hoping to be able to feature again this week (if I can get my act together and finish off the egg carton organiser tutorial), so keep an eye out for that.
Redwork Christmas Quilt (Update #3)
So by now you are probably wondering how the redwork Christmas quilt is coming along for Little Snicker. Well I still haven't done the writing on the second block, BUT I have designed the third block and have almost finished stitching it as well.
Just to recap, here is a picture of the first block:
 And the second (minus the writing):
 And this is what the third block looks like at the moment:
 The words for this block are: "At Christmas, all roads lead home".
I think stitching the writing must be my least favourite part, as I have no inclination to start the writing on the third block at this point in time either! It's so fiddly and time consuming. I actually think the writing on the second block will take me just as long as it took to stitch the rest of the block. Nevermind - I have to do it sometime I guess.
So, I am now almost 1/3 of the way through the blocks for the quilt which really isn't a bad effort at all. I must admit I am a bit stuck now though. I'm really not sure what to put on the next one... Guess I'll just wait for the inspiration to hit!
Just to recap, here is a picture of the first block:
 And the second (minus the writing):
 And this is what the third block looks like at the moment:
 The words for this block are: "At Christmas, all roads lead home".
I think stitching the writing must be my least favourite part, as I have no inclination to start the writing on the third block at this point in time either! It's so fiddly and time consuming. I actually think the writing on the second block will take me just as long as it took to stitch the rest of the block. Nevermind - I have to do it sometime I guess.
So, I am now almost 1/3 of the way through the blocks for the quilt which really isn't a bad effort at all. I must admit I am a bit stuck now though. I'm really not sure what to put on the next one... Guess I'll just wait for the inspiration to hit!
Monday, May 10, 2010
12 Weeks Old
Yesterday, not only was it Mother's Day but also the day that Little Snicker turned 12 weeks old. As such, this will be my last weekly update on him. Lets face it, it wouldn't be cool to still be posting about him on his 1096th week (which would be his 21st birthday).
So, today I thought I would show you this terribly cute photo of him that we captured on Friday:
 Adorable, hey. So sad, so sad.
Anyway, the things I have learned this week are:
"Sleeping Through the Night" can mean many things - We had a discussion about this last week at Mother's Group. Basically, the Health Nurse said that if your baby is sleeping from 11pm through to 5am, that's 'sleeping through'. I was a bit disappointed as Little Snicker doesn't look to be doing anything of the sort....but then when I explained what Little Snicker does, the Health Nurse advised that he actually IS sleeping through the night... just not the right part of the night lol.
You see, we feed him at 5.30pm and have him in bed asleep by 6.30pm. The last couple of nights he hasn't woken up until between 12.30am and 1.30am, which means that he is getting his 6 or 7 hours of full sleep. The bad side to the fact that he sleeps earlier than most other babies, is that he is awake a LOT earlier too. None the less, he is technically 'sleeping through'.
And finally...
There are very few things more rewarding than being a mum - When we start the day at 4.30am, my eyes are generally hanging out of my head and I wonder what on earth we got ourselves in to. But all I have to do is look at Little Snicker playing on the floor, smiling at his Sock Owl Mobile, to know that I wouldn't change anything for the world.
I have a very career orientated friend (you know who you are!) who can't really understand why the mum's in our group of friends have put their career on the backburner for a couple of years. I don't think you can possibly understand until you've had your own child. The joy they bring is simply indescribable.
Just because this is my last weekly update, doesn't mean that I won't still be posting pictures of Little Snicker as he learns new things. He will, of course, also be my model for anything I make that requires a demonstration.
Well, I hope you all had a great Mothers Day. I best go and do some washing while the weather is nice!
So, today I thought I would show you this terribly cute photo of him that we captured on Friday:
 Adorable, hey. So sad, so sad.
 Anyway, the things I have learned this week are:
"Sleeping Through the Night" can mean many things - We had a discussion about this last week at Mother's Group. Basically, the Health Nurse said that if your baby is sleeping from 11pm through to 5am, that's 'sleeping through'. I was a bit disappointed as Little Snicker doesn't look to be doing anything of the sort....but then when I explained what Little Snicker does, the Health Nurse advised that he actually IS sleeping through the night... just not the right part of the night lol.
You see, we feed him at 5.30pm and have him in bed asleep by 6.30pm. The last couple of nights he hasn't woken up until between 12.30am and 1.30am, which means that he is getting his 6 or 7 hours of full sleep. The bad side to the fact that he sleeps earlier than most other babies, is that he is awake a LOT earlier too. None the less, he is technically 'sleeping through'.
And finally...
There are very few things more rewarding than being a mum - When we start the day at 4.30am, my eyes are generally hanging out of my head and I wonder what on earth we got ourselves in to. But all I have to do is look at Little Snicker playing on the floor, smiling at his Sock Owl Mobile, to know that I wouldn't change anything for the world.
I have a very career orientated friend (you know who you are!) who can't really understand why the mum's in our group of friends have put their career on the backburner for a couple of years. I don't think you can possibly understand until you've had your own child. The joy they bring is simply indescribable.
Just because this is my last weekly update, doesn't mean that I won't still be posting pictures of Little Snicker as he learns new things. He will, of course, also be my model for anything I make that requires a demonstration.
Well, I hope you all had a great Mothers Day. I best go and do some washing while the weather is nice!
Subscribe to:
Posts (Atom)

