skip to main |
skip to sidebar
Remember a while ago I made a crocheted blanket? It was always intended for our next baby, which will of course be arriving in a couple of months. Since the blanket I made for Little Snicker had an owl appliqued on it, I figured I should applique something on this one. So I did... a cute little elephant:
I hadn't ever used wool felt before, but The Ballarat Patchwork Shop has the most awesome colours in a larger than usual size for a mere $4.50, so I decided to give it a whirl. I don't think I'll EVER go back to using acrylic again. Look at the fantastic colour range available:
This blanket sets the tone for the new nursery theme, which is Vintage Circus. I cant' wait until we move house so that I can get stuck into creating the new nursery (after I recreate Little Snicker's owl themed room of course!
I know it's been a while! Life has just been a little more stressful than it's needed to be over the last two weeks, so crafting has kind of been pushed to the back burner.
I have, however, been working on the crocheted blanket and am pleased to report it is now finished:
 Well, except for all of those tiny little ends that need to be sewn in still. I guess that's the worst part about crocheting in stripes!

In other news, I am returning to work full-time as of today. I'm not sure how I feel about it yet, but I'm pretty sure waking up at 3.45am will make the day feel twice as long as it needs to!
Gosh the days have been flying on by and I have only just finished everything I need to do in time for Christmas!
I had great plans of popping in here with some last minute gift ideas, however those plans were foiled when the present I chose to make my sister took twice as long as I had hoped (isn't that always the way!)
While I can't show you a lot of the things I have been making this week, I can show you this tutorial on how to make a biscuit station for your Christmas guests! You could use this at any time during the year though, if you chose a non-specific paper for your lids.
Anyway, what is a biscuit station? Well, it's a fancy term used to describe a set of glass jars with screw lids that you fill up with biscuits for your Christmas guests. That way, if the guests get hungry, they can just help themselves.
You Will Need:
Some suitable glass jars with a screw top lid. (I picked mine up for $3 each at the local reject type store)
Door knobs, for the top of the jars
Scrapbooking paper (for the lids of the jar)
Mod Podge
Spray paint
Cardstock that matches the colour of the spraypaint (for the labels)
Instructions:
Take your glass jars and remove the lids:
 Drill a hole in the centre of each of the lids that is big enough to fit the screw for your door knob:
 Spraypaint the lids. I painted my lids 'coffee cream', however the weather was so terrible on the day that I did it, they don't look anything like that colour. You will need to spray them with 4 coats to make sure they are adequately covered:
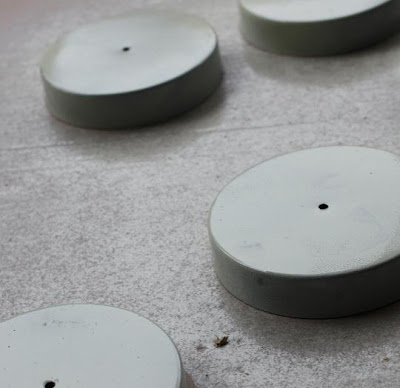 Next, cut a circle of Christmas paper, slightly smaller than the top of the lid and use mod podge to stick it in place. Once dry, mod podge over the top to seal it (I have no idea why this photo keeps uploading sideways!):
 Screw your door knobs to your lids. You might need some 'manly' help for this one to ensure that they are on tight enough. If they are not on tight enough, they will come undone when someone tries to open the jar:
 Next, take your cardstock and make some labels for the front of your jars. Adhere them to the front of the corresponding jar and then fill the jars with some biscuit-y goodness!
 Oh noes....someone stole the Pfeffernusse! Kidding... we just hadn't gotten any yet!
I'll admit that it has been pretty quiet in here the last couple of days, but... I promise I have been crafting and not just lazing around, watching TV and eating chocolate (ok, there might have been a little of that as well!)
Unfortunately I can't share what I've been working on as it has involved a lot of Christmas present making and I don't want to spoil the surprise in case one of the recipients should happen to read my blog.
What I can show you though, is my idea's journal. I've been keeping for a while now and it basically houses a whole heap of ideas for things that I would like in my next house.
The journal itself is just an A4 sized visual diary designed for sketching in. I have broken mine into the following sections - Kitchen, Living Area, Bedrooms, Outdoors and Craft Room.
Here is a picture from the 'Living Area' section:
 Once I put the pictures in, I write down what I like about certain images, any ideas I have that compliment the pictures I've chosen, or the actual cost of an item I might like to purchase.
In addition to images, I also glue fabric and paint swatches in:

Some images have inspired me to start collecting things (although I'm going to collect coffee and tea pots rather than espresso cups):

The only thing wrong with my idea's journal is it's cover:

Ergh.. it is soooo boring and really doesn't give you any hint to the goodness that lies inside. I think I might have to do something about that!I hope you are having a wonderful week!
I have been trying to crochet a blanket with granny stripes, but I have to admit it is getting the better of me.
First I had issues with the colours and then I had issues with the size. Now I have tension issues. Significant tension issues:

I kind of hoped that it would fix itself as I went on, but as you can see it is definitely semi circle in shape!
Oh well, I've changed my mind on the colours again anyway! Back to the beginning I go!
Today I am going to show you how to make markers for your vegetable garden, using old spoons.

You Will Need:
Some old silver spoons
A hammer (or rubber mallet)
A black permanent market
A set of alphabet metal stamps
A piece of steel wool
A piece of steel, or something hard to hammer the spoons flat on
Instructions:
As these markers are for the garden, it doesn't matter what condition the silverware is in. I used some pretty crusty ones I picked up at a garage sale. I got 30 spoons for $3!
First you will need to flatten the spoons. I did this by placing my spoon on top of a piece of steel and then whacking it with a hammer:
 Hammering it in this way will leave marks (like in the picture below), so if you don't want the marks you are best to use a rubber mallet instead and wrap your spoon in a piece of cloth (which is how I flattened the spoons for the coat rack)
 You will need to turn your spoon over periodically to flatten it out successfully. I sometimes need to turn the spoon over a good 8 or 9 times, so don't give up too early! Eventually it will be flat, like this:

Once your spoon is flat, grab a black permanent marker and place large dots where you want your letters to be. This helps the letters to stand out once stamped in. As I am making a marker for 'lettuce', I have placed 7 dots on the spoon.

Next, place the spoon on top of the piece of steel. I clamp it all to the bench so that it doesn't move around too much during the next step.

Take your metal stamps and your hammer and punch the word into the top of the spoon.

Next, get a piece of steel wool and buff away at the black marker until it disappears.

Now make as many markers as you need and then pop them in your garden!
Do you ever have a brilliant crafting idea only to find when it comes to the execution, it doesn't turn out as awesome as you thought it might have?
That's exactly what happened with my idea for a coat rack.
The original plan was to include my paper ephemera collection on the backing board and use a set of spoons I found while 'thrifting' as the hooks.
Turns out that the ephemera really looked quite awful. So awful in fact, that I couldn't even bring myself to take a picture for you! The spoons, however, were an awesome idea!
Anyway, as per usual, I focused on other projects constantly thinking about the coat rack and trying to find something that would be more suitable on the backing board. I couldn't seem to stop thinking about using stuff from my travels, so when Matty mentioned that I could use my coin collection, I thought it was a swell idea!
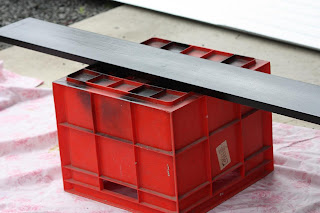
First I made the backing board for the coat rack from a piece of pine that I spray painted black:
 I then washed and dried my coin collection before stacking the coins in order from smallest to largest, to make it easier to locate the right sized coin:
 Meanwhile we flattened out the spoons by putting them on a piece of steel and banging them with a rubber mallet. We then drilled holes in them to attach them to the board at even intervals:
 Once the spoons were attached, I had fun arranging my coins onto the backing board (this actually took a lot longer than I expected it would):
 I then carefully glued them in place:
 To fix it to the wall, Matty removed the spoons on each end and bolted the board directly into the wall studs. Once the spoon handles were bent, the coat rack was complete!

There are so many interesting coins on there, from countries all around the world!

Just perfect for a mummy-sized coat, a daddy-sized coat and a Little Snicker-sized coat:

Guess I better find another project for the ephemera!